What Are the Steps Involved in the Car Glass Replacement Process?
Discover the step-by-step process of car glass replacement and what to expect from start to finish. Learn more here!
Car glass replacement is something most vehicle owners will experience at some point. Whether it’s due to a cracked windshield, a chipped side window, or a shattered rear glass, replacing car glass is necessary for safety, visibility, and comfort. But what does this process actually involve?
In this article, we’ll walk you through the steps of car glass replacement, explain why it's important, and guide you on how to handle the situation. You’ll gain a clear understanding of the procedure, so you can approach the replacement confidently. Let’s dive in!
Why Is Car Glass Replacement Important?
Before we dive into the steps, let’s quickly touch on why car glass replacement is essential. Your car's glass isn’t just there to keep the weather out—it plays a crucial role in your vehicle’s overall safety. A properly installed windshield, for example, provides structural support to the car during a crash and keeps the airbags in place. Damaged glass can reduce visibility, making driving dangerous, especially if the crack or chip obstructs your view.
Additionally, broken glass leaves your car vulnerable to further damage or even theft, which is why timely replacement is important.
Step 1: Assessing the Damage
The first step in the car glass replacement process is to assess the damage. This is when a professional technician inspects the glass to determine if it needs replacing or if it can simply be repaired.
How to Know If Your Glass Needs Replacement
Not every chip or crack requires a full replacement. If the damage is small and located in a non-critical area, it might be repairable. However, larger cracks, deep chips, or damage near the edges of the glass often mean a replacement is necessary.
Factors That Influence the Decision
Several factors will influence the technician’s decision, including:
- Size of the crack or chip: If it's larger than a quarter or extends beyond the driver’s line of sight, replacement is likely needed.
- Location of the damage: Cracks at the edge of the windshield or on the side windows often require a full replacement.
- Depth of the damage: If the crack or chip is deep enough to affect the integrity of the glass, a replacement is necessary.
Step 2: Choosing the Right Glass
Once it's determined that you need a replacement, the next step is selecting the right type of glass for your car. This step ensures that the new glass is the right fit for your vehicle’s make and model.
OEM vs. Aftermarket Glass
There are two main options for replacement glass:
-
OEM (Original Equipment Manufacturer) Glass: This is the same type of glass your car had when it left the factory. It’s made by the same manufacturer that produced the original glass, which guarantees it matches the quality and safety standards.
-
Aftermarket Glass: Aftermarket glass is produced by third-party companies and is generally more affordable. However, the quality may vary, so it’s important to choose a reputable brand.
What to Consider
When selecting your glass, keep these factors in mind:
- Brand Reputation: Choose a trusted brand with a good track record.
- Vehicle Model Compatibility: Make sure the glass is specifically designed for your car’s make and model.
- Safety Features: Some modern windshields come with additional features, such as built-in sensors for rain or lane departure warnings. Be sure to select a glass that maintains these features.
Step 3: Scheduling the Appointment
Now that you know the damage needs to be replaced and the type of glass to use, it’s time to schedule the replacement appointment. Many auto glass repair shops offer flexible scheduling, and some even offer mobile services, meaning a technician can come to your home or office to replace the glass.
Where to Go for Replacement
- Auto Glass Shops: These are dedicated stores that specialize in replacing car windows and windshields. They offer quick and reliable services.
- Mobile Services: If you can’t visit a shop, look for mobile glass replacement services that will come to your location.
- Dealerships: If you want OEM glass, the dealership may offer replacement services, but this can be more expensive than other options.
How Long Does It Take?
The replacement process typically takes about 1-2 hours, depending on the type of glass and the complexity of the job. Some auto glass shops can do it even faster, especially if you choose mobile services.

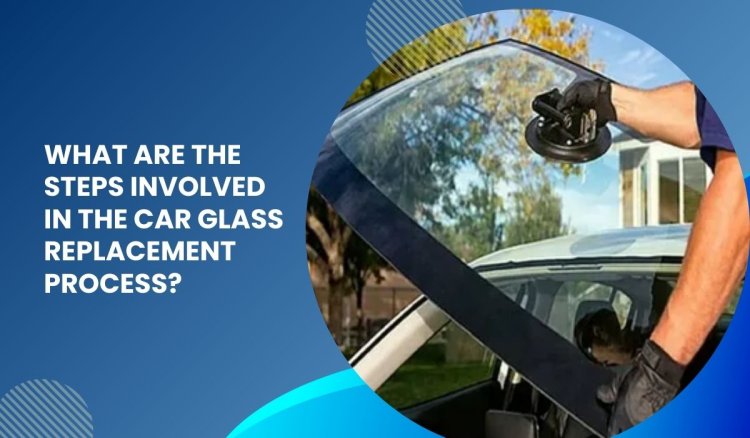
Step 4: Removing the Damaged Glass
Once you arrive at the shop or the technician arrives at your location, the next step is to remove the damaged glass. This part involves carefully removing the broken or cracked glass from the frame of the car.
Tools and Techniques
The technician will use special tools, such as a windshield removal tool, to gently break apart and remove the damaged glass without damaging the surrounding frame. It’s important that this is done carefully to avoid scratching the paint or damaging the seal.
Safety First
Since the glass is broken, safety is a priority. The technician will wear protective gear to ensure they don’t cut themselves on sharp edges. The area will also be cleaned to ensure there’s no broken glass left behind.
Step 5: Preparing the Frame
Before the new glass is installed, the frame where the glass will sit must be thoroughly cleaned and prepared. This step is important for ensuring that the new glass fits properly and is securely held in place.
Cleaning the Old Adhesive
The technician will remove any leftover adhesive from the frame and ensure there are no dirt, dust, or debris in the area. This is crucial because any particles left in the frame can prevent the new glass from bonding properly.
Applying the New Adhesive
A special type of adhesive is then applied to the frame. This adhesive is strong and designed specifically for bonding glass to the car’s body. It must be applied evenly to ensure that the glass is securely held in place.
Step 6: Installing the New Glass
Now it’s time for the new glass to be installed. The technician will carefully place the new glass into the prepared frame, ensuring that it fits snugly and is aligned properly.
Checking for Alignment
Once the glass is placed, the technician will check to ensure it’s properly aligned. If the glass isn’t positioned correctly, it could cause issues with visibility or even safety. This step ensures that everything is in place before moving on.
Securing the Glass
The glass is then securely attached to the frame using the adhesive. The technician will hold it in place for a few minutes to allow the adhesive to start bonding.
Step 7: Curing and Drying Time
After the new glass is installed, it needs time to bond properly. The adhesive must cure before the vehicle can be driven, so it’s important to allow enough time for this process.
How Long Should You Wait?
The curing time can vary depending on the adhesive used, but generally, it’s recommended to wait at least 30 minutes to an hour before driving. Some adhesive brands may require up to 24 hours to fully cure, so be sure to follow the technician’s instructions for the best results.
Why Curing Is Important
The curing time ensures that the adhesive sets properly, which will provide a strong and secure bond between the glass and the frame. Rushing this process can result in the glass coming loose over time, which could lead to serious safety risks.
Step 8: Final Inspection
After the adhesive has had time to cure, the technician will perform a final inspection of the installation. This step ensures that everything is in place, the glass is secure, and there are no gaps or leaks.
What They Check
- Seal Quality: The technician will check around the edges of the glass to ensure that the adhesive has formed a proper seal.
- Glass Alignment: They’ll ensure that the glass is properly aligned with the frame and that there are no uneven gaps.
- Functionality: For windshields with sensors or other special features, the technician will test these to ensure they’re working correctly.
Step 9: Cleaning and Finishing Touches
Once everything is checked and inspected, the final step is cleaning the new glass. The technician will wipe down the glass to remove any fingerprints, dust, or other marks that may have been left during the installation.
What’s Left to Do?
- Cleaning the Interior and Exterior: Both the inside and outside of the new glass will be cleaned.
- Window Check: The technician will also check that the window functions properly, ensuring that it opens and closes smoothly if it’s a side or rear window.
Step 10: Drive Safely
Once all steps are complete and the technician gives the go-ahead, you’re ready to drive. However, be sure to follow any aftercare instructions provided by the technician to ensure your new glass stays in good condition.
Conclusion
Car glass replacement may seem like a complicated process, but understanding the steps involved can help demystify it. By following these simple steps, you can ensure your car’s glass replacement is done safely and properly, keeping you and your passengers secure on the road. Whether it’s a cracked windshield or a shattered side window, getting the right replacement is key to maintaining the safety and integrity of your vehicle.
If you ever find yourself needing a car glass replacement, make sure you choose a reliable service provider who uses quality materials and provides excellent customer service. Your safety is worth it!
For More Insightful Articles Related To This Topic, Feel Free To Visit: newswireengine.
What's Your Reaction?


.jpg)